- 3-minute read
- 12th June 2017
Adding Chapter Headers in Microsoft Word
If you’re writing a longer document, you might want to add chapter headers. If nothing else, they make it much easier to find a particular section in a document quickly. Some universities also require them in theses and dissertations.
Luckily, they’re also reassuringly easy to add in Microsoft Word, as we will explain in this post.
Step One: Apply Heading Styles
Microsoft Word can automatically generate chapter/section headers based on the headings in your document. But to do this, you need to apply Heading styles first.
These can be found in the Styles gallery on the Home tab (or via the Styles pane). Usually, you would use ‘Heading 1’ for the main headings in your document. So what you need to do is:
- Find ‘Heading 1’ in the Styles gallery

The ‘Styles’ gallery. If you need to apply specific formatting options, right click and select ‘Modify’
- Select formatting as required and click ‘OK’ to update the style
- Go through your document applying ‘Heading 1’ to all chapter headings
Step Two: Adding Section Breaks
Next, you will need to add section breaks between each chapter. This will let you apply a different header to each section of the document. The process here is:
- Find the start of the first chapter in your document and place the cursor before the heading
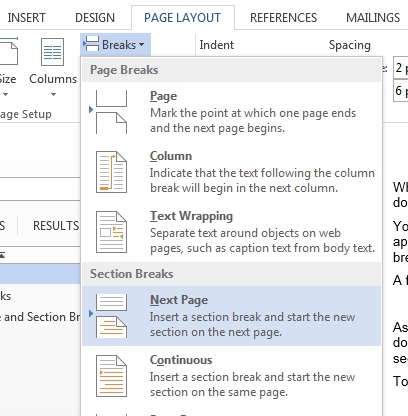
- Go to ‘Page Layout’ and select ‘Next Page’ from ‘Section Breaks’ in the ‘Breaks’ menu

Adding section breaks. - Repeat this for each chapter in your document
Step Three: Adding Headers
And now, the moment of truth! This step can be broken down into two parts. First, you need to make sure that the headers in each section are separated. To do this:
Find this useful?
Subscribe to our newsletter and get writing tips from our editors straight to your inbox.
Subscribe to Beyond the Margins and get your monthly fix of editorial strategy, workflow tips, and real-world examples from content leaders.
- Go to the first chapter in your document
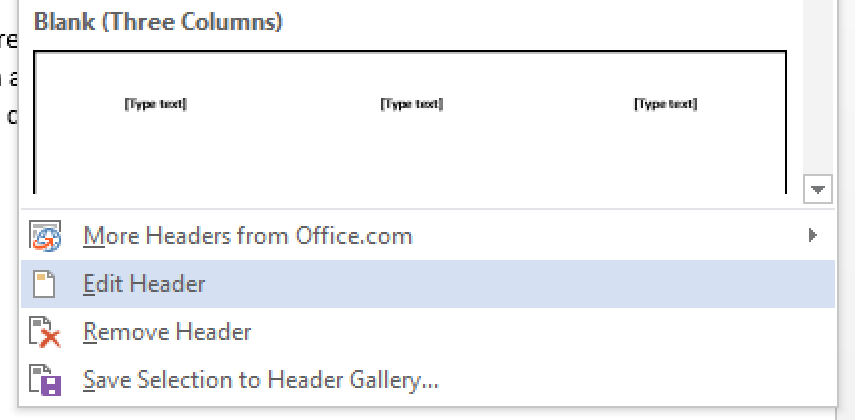
- Open the header by double clicking the space at the top of the page or going to Insert > Header & Footer > Header > Edit Header

Editing headers. - Once the header is open, go to Design > Navigation and deselect ‘Link to Previous’

Unlinking sections. - Repeat for each chapter or section in the document
This will let you apply a separate header in each section. All you need to do is:
- Open the header in the first section/chapter
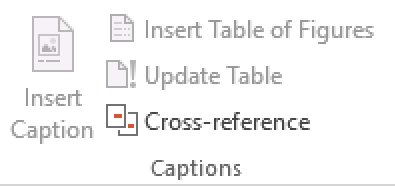
- Go to References > Captions > Cross-reference

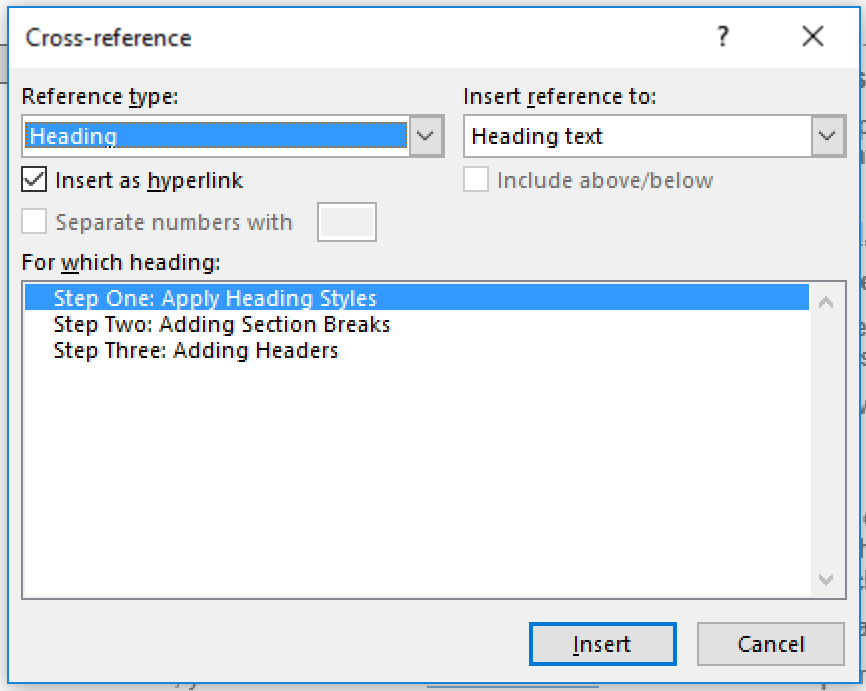
Cross-referencing. - In the new window, select ‘Heading’ under ‘Reference type’
- Pick the relevant heading from the list available and click ‘Insert’

Adding chapter headers. - Repeat for each chapter/section in the document
This will add the chapter title to the page header throughout each section. Keep in mind, though, that you will need to change the headers if you revise the chapter titles during editing, as they do not update automatically.
Once this is done, your document will look superbly professional.

