- 2-minute read
- 26th February 2018
Microsoft Word Tips: Text Alignment
It might seem shallow, but how a document looks can be almost as important as what it says! This is partly because you want to make a good first impression on your reader, but untidy formatting can even make a document more difficult to read in some cases.
As such, it’s important to understand how text alignment works in Microsoft Word.
What Is Text Alignment?
The text alignment options in Microsoft Word help control where text appears on the page. Specifically, they control the text’s position (and how it is spread out) in relation to the margins.
To control this, you can use the ‘Paragraph’ section of the ‘Home’ tab on the main ribbon.

Your options here are as follows (from left to right as displayed in the menu):
Find this useful?
Subscribe to our newsletter and get writing tips from our editors straight to your inbox.
Subscribe to Beyond the Margins and get your monthly fix of editorial strategy, workflow tips, and real-world examples from content leaders.
- Align Left – Aligns the text with the left margin of the page
- Center – Positions text centrally on the page
- Align Right – Aligns text with the right margin (text still reads from left to right)
- Justify – Aligns text so that the first word on a line begins at the left margin and the last word on a line ends at the right margin (this is also known as ‘full justification’)
Which Alignment Should I Use?
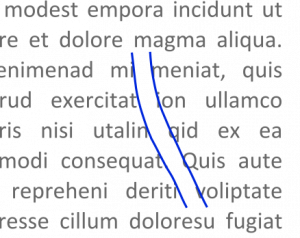
In most cases, Justify and Align Left are your best options for larger blocks of text. Many universities require you to use full justification in essays, for example, as it looks neater on the page. However, publishers often prefer left alignment because it prevents ‘rivers’ (i.e. vertical spaces between words).

Center is most useful for titles, subtitles and short passages that have been set apart from the main text. If you want to have a larger block of text in the middle of the page, though, you are better off indenting the passage from the margins and using Align Left or Justify.

Align Right is significantly less common that the other options. Nevertheless, it can be useful for some short passages of text (e.g. if you want to line up a caption with the right-hand side of an image).


