- 3-minute read
- 9th November 2017
Microsoft Word Tips: Images and Text Wrapping
According to the old saying, a picture is worth a thousand words. Despite this, pictures do not count towards the word limit in an essay, so you might want to consider using them in your work!
If you are going to add images to a document, though, you need to make sure they’re correctly formatted. And a big part of that is text wrapping, which is what we’re looking at here!
What Is Text Wrapping?
In Microsoft Word, text wrapping controls how images are positioned relative to text. This can be used to ensure that images are presented clearly in a document. The main options here are:
- In Line with Text – Places the image on the same line as surrounding text with no wrapping.

In Line with Text - Square/Top and Bottom – These position text at right angles to an image. ‘Square’ does so on all sides, whereas ‘Top and Bottom’ aligns the image with text above and below.

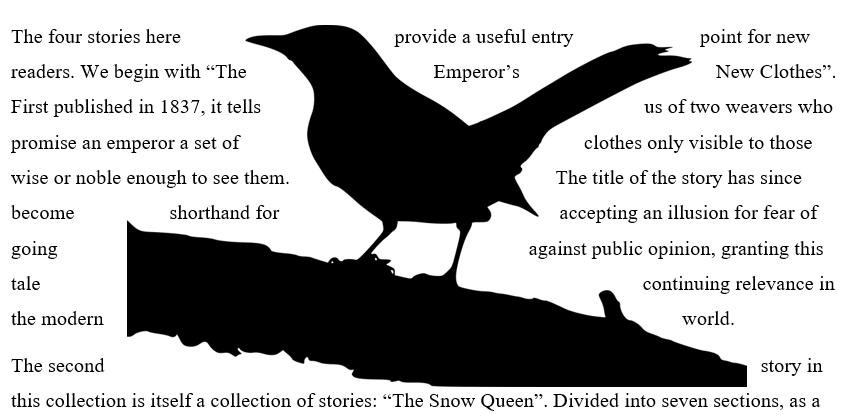
Square - Tight/Through – ‘Tight’ wraps text around the edges of an image. The ‘Through’ setting is similar, but it will also fill any gaps in the image.

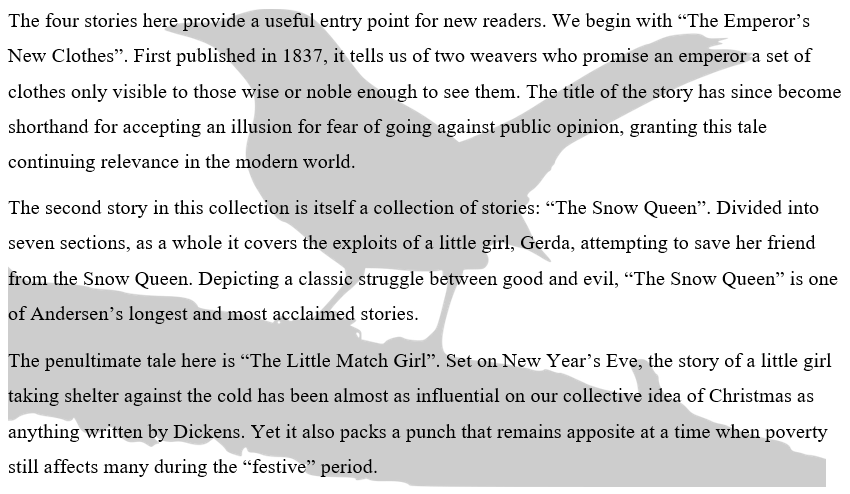
Through - Behind Text/In Front of Text – These do what you would expect: ‘Behind’ places the picture behind the text, while ‘In Front of Text’ places the image in front of the text. We are not yet entirely sure why you would want to put an image in front of text, though.

Behind Text
The default setting when you add an image to a document is ‘In Line with Text’. This will be fine as long as you put the image on a new line, as you will simply have text above and below it. But if you want more control over image position, ‘Square’ and ‘Tight’ will usually be your best options.
How to Set Text Wrapping
Once you have added images to a document, you can adjust the text wrapping to make sure they fit with the surrounding text. To do this:
Find this useful?
Subscribe to our newsletter and get writing tips from our editors straight to your inbox.
Subscribe to Beyond the Margins and get your monthly fix of editorial strategy, workflow tips, and real-world examples from content leaders.
- Click the image that you want to adjust
- Click the ‘Layout Options’ button or go to Format > Arrange > Wrap Text

The ‘Layout Options’ button. - Pick the text wrapping setting you want from the options available

Text wrapping options.
This will then adjust the text wrapping in relation to the image. When you do this, make sure that text elsewhere in the document hasn’t shifted and caused alignment issues.
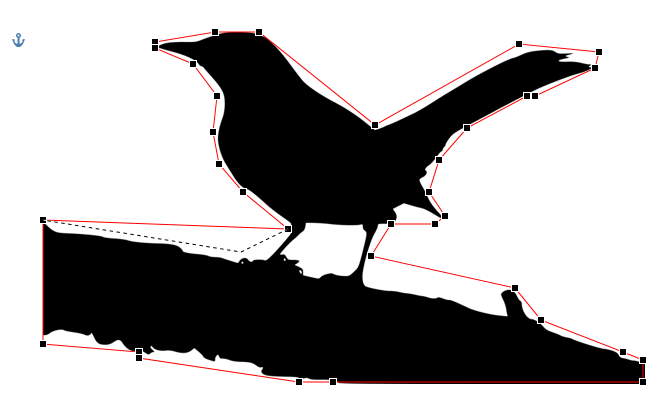
With the ‘Through’ setting in particular, you may also need to adjust the wrapping points (i.e. the places in the image that text is allowed to fill). You can do this by:
- Clicking the image and checking that ‘Through’ wrapping is selected
- Going to Format > Arrange > Wrap Text > Edit Wrap Points
- Clicking and dragging the red lines to set the image outline

The surrounding text will then fill any ‘gaps’ in the image set using the wrap points. Give it a try!


