-
3-minute read
-
8th January 2017
Using Track Changes in Microsoft Word
Editing a document can be hard work (as proofreaders, we know this better than anyone). But there are tricks you can use to make life easier, such as the ‘Track Changes’ function in Microsoft Word.
This is how we record corrections when you send a document to us for proofreading. But you can also use it yourself while redrafting an essay. In this blogpost, we explain why you should.
What Is the ‘Track Changes’ Function?
The aptly named ‘Track Changes’ tool in Microsoft Word automatically records any changes made to a document while it is turned on. As well as letting you quickly see where alterations have been made, this makes it easier to review and revert edits if you change your mind later.

As such, it can be a great time saver when editing an essay or dissertation chapter.
How to Use Track Changes
This tool is also very easy to use. In Word 2007 or later, to turn it on, simply:
- Go to the ‘Review’ tab on the main ribbon
- Click ‘Track Changes’ in the ‘Tracking’ section
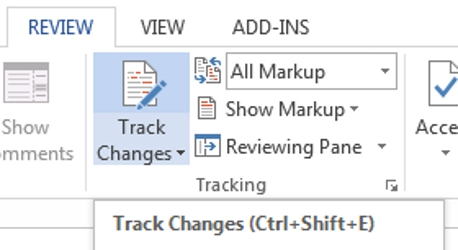
Clicking the button again will turn the function off when you’ve finished making edits.
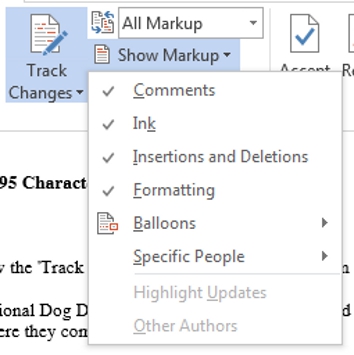
The other crucial part of the ‘Tracking’ section relates to how changes are displayed (i.e. the ‘markup’ options). These are accessed via a menu next to the ‘Track Changes’ button.
Find this useful?
Subscribe to our newsletter and get writing tips from our editors straight to your inbox.
Subscribe to Beyond the Margins and get your monthly fix of editorial strategy, workflow tips, and real-world examples from content leaders.
In the most recent versions of Word (2013 and 2016), the options available here are:
- Simple Markup – Edits identified via red marks on the left of the page. Clicking these switches you to ‘All Markup’ and displays the changes.
- All Markup – Edits show up in red within the main text. Deleted text also shows up in red using the strikethrough effect (e.g. like this).
- No Markup – Displays the current document with no edits highlighted.
- Original – Shows the document prior to any edits being made.
In Word 2007 and 2010, the options available are similar but with different names:
- Final Showing Markup – Edited version of document with changes shown in red.
- Final – Edited version of document with no changes shown.
- Original Showing Markup – Original text with edits shown in red.
- Original – Original text with no edits shown.
To further customise the markup in your document, you can select specific types of edit (insertions and deletions, formatting, etc.) to display via the ‘Show Markup’ menu.
Reviewing Changes
Once you’ve finished editing your document, you can go through the tracked changes using the ‘Previous’ and ‘Next’ buttons in the ‘Changes’ section of the ‘Review’ tab. You can also accept or reject individual changes using the corresponding buttons in this panel.
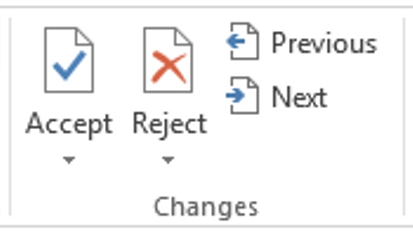
Alternatively, you can tackle all changes in a document at once by clicking the little arrow on the relevant button and selecting ‘Accept All’ or ‘Reject All’ as required.